The ability to send e-mail from a mailbox alias, a so-called Proxy Address, has been on the Microsoft 365 roadmap for over a year. You can now enable this. It seems to be working for both Outlook clients and the web-based versions, although the official status at the time of writing is still “In Development” according to the Microsoft 365 roadmap.
When you use an alias to send an email, that alias will be shown in the From and Return-Path field. The recipient will only see your chosen alias and not your primary email address. If you pick another domain as an alias, the DKIM will also be dynamically changed to the other domain. Your (display)name, however, will not change.
What is an alias
Every exchange-enabled user has a primary email address but can also have 1 or more extra addresses configured. Mails send to those addresses will end up in the mailbox of the user as well. For example, this is useful if a user changed their email address and still wants to accept emails sent to the old address. A user can NOT set their own alias. This can only be configured by an admin.
Traditionally an alias is only used for receiving emails. You could not send mails using an alias. This has now changed.
Enabling sending as an alias in your tenant
The setting that enables this feature is by default disabled. Enabling requires powershell.
First, connect to Exchange Online with a Global Admin account.
Set-OrganizationConfig -SendFromAliasEnabled $trueYou can check the current configured setting in your tenant via this command:
Get-OrganizationConfig|select SendFromAliasEnabled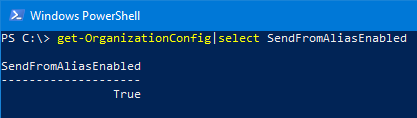
True: Users get an option to send messages and reply to messages with a proxy address.
False: Users can only send messages and reply to messages using their primary email address. This is the default value.
Wait about 30 minutes for the setting to become active after enabling.
Sending email using an alias
In Outlook, make sure that the From field is displayed (otherwise enable it).
- Click on From
- Choose Other email address
- Select or type your alias and click Ok
A word of warning: a reply to your email will simply show up in your mailbox. Be careful because if you then reply to that email, you need to manually select your alias again as the “From” address or risk exposing your primary email address.